Ok, the last two weeks have been a little complicated (Supplies)(Piecing the pattern)(Pattern Adjustments)…and we haven’t even touched fabric yet! Never fear, we will finally do that today. Get ready to cut out the fabric for your fitting muslin! Cutting out a sewing pattern is a fairly universal process, so if you’ve done this before, just go ahead and do your thing! I’ll just share some of my tips and tricks below.
For this step, you will need:
- Your adjusted (if necessary) Mandarin Shirt pattern pieces
- Fabric for your muslin, washed and prepped
- I bought a plain, non-stretch cotton fabric (similar), as this will not need to be a wearable garment. It will only be used to check the fit and make further adjustments.
- Pattern weights or pins
- Fabric scissors or rotary cutter
- Pencil, tailor’s chalk, or other fabric marking utensil
- I am a HUGE fan of the Pilot Frixion highlighter for fabric marking! It removes with an iron.
- I also caved and used a Crayola washable marker for parts of this….again, not a wearable garment, so removable markings aren’t as important.
Firstly, for your fitting muslin, you don’t technically *need* to use all of the pattern pieces. It would be a good idea to cut out one of every piece so you can practice doing the steps before doing them on your final shirt. But the minimum pieces necessary to check the fit of the garment are:
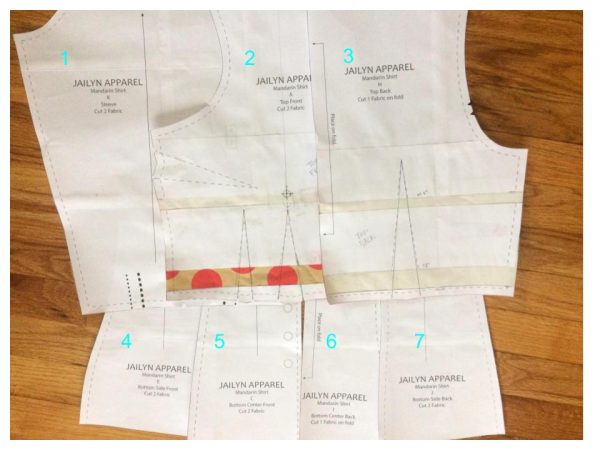
1 – Sleeve, 2 – Top Front, 3 – Top Back, 4 – Bottom Side Front, 5 – Bottom Center Front, 6 – Bottom Center Back, 7 – Bottom Side Back
I cut these 7 pieces and the front facing piece for good measure. I may go back and cut the collar and cuffs if I decide I want to practice them before my final shirt.
The Mandarin Shirt sewing instructions include a variety of cutting layouts for your reference! Whatever you do, just be sure your grain line is always parallel to the selvage edge of the fabric.
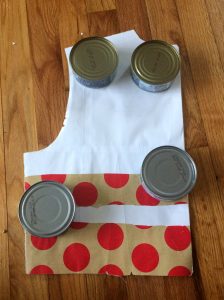
My preferred method of cutting out patterns involves pattern weights (AKA tuna cans) and my fabric scissors. Canned goods are a great, inexpensive pattern weight!

And this way, you don’t have to stab pins through printer paper, or chance that the pins will wrinkle the pattern and make your seams uneven.
Just place the cans near edges and it will hold the piece in place as you cut. You could also use a rotary cutter+mat for this step.
After you cut out a piece with pattern markings, such as darts, be sure to transfer those to your fabric!
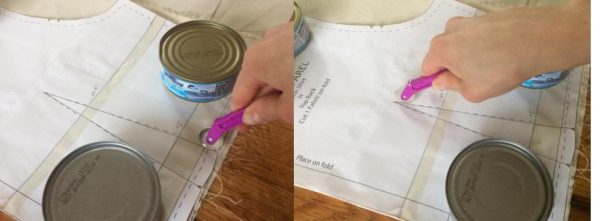
That purple dealio is a pattern marking wheel. It pokes tiny holes through the pattern and transfers them on to the fabric underneath! Can you see it?

Don’t forget to flip the pattern upside down on the opposite side of your fabric to mark that piece as well.
After using the pattern marking tool, I go over the tiny dotted lines with my Frixion erasable highlighter. Mine is running out of ink and was hard to see in the photo, so I outlined it for you:
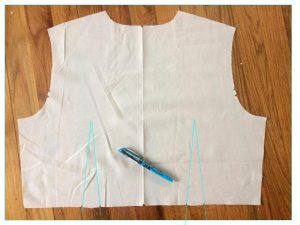
You can also see the alignment notches cut out along the edges of this piece! Don’t forget to do those, either. One of the most frustrating feelings is when you are trying to ease a sleeve to an arm hole….and then you realize you don’t even know where the center of the sleeve is because you forgot to cut out the notches. Trust me on this one 🙂
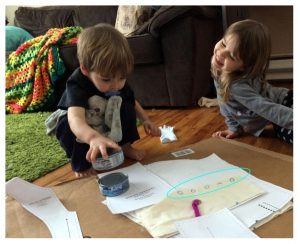
I had some pretty cute helpers as I was finishing this up. I usually do these things while they’re out of the way, but nap time was exceptionally short this day. So I let them play with the “pattern weights” and the tracing wheel while I cut out the last couple pieces. They had so much fun!
I also circled my button markings in that photo to point out….I used a Crayola washable marker for them. Haha! I would never do that on an actual garment, but since my erasable marker was running out of ink and it’s just a fitting muslin…I went for it.
Next week: we start to sew! Finally!! And then check to see if even more adjustments need to be made 🙂 There is a ton of prep work that goes into constructing a garment like this, but the payoff is worth it. You’re going to have a one of a kind, handmade top that is perfectly catered to your body! Woohoo!
Save