Today, we are going to walk through the printing and assembly of your PDF pattern. You can, of course, get this pattern printed on a continuous roll of paper at a print shop if you’d prefer to skip this step. But printing and assembling at home isn’t as difficult as it sounds! It takes a bit of time and concentration, but it’s not difficult. And I must say, Jodi from Jailyn Apparel has done a phenomenal job with this pattern. It is easy to assemble and the PDF instructions are incredibly detailed and helpful!
Step One: Prepping for printing
When you download your file, make sure you open it in Adobe Acrobat Reader — NOT your web browser! Some browsers like to open PDF files directly in the browser, but this can sometimes cause issues with the printing size. If you don’t have Adobe Reader on your computer, you can download it here for free.
The next thing you’ll want to do is utilize the amazing “Layers” function in this pattern! If you haven’t already, measure yourself (bust, waist, and hip) and choose which size you will be making from the detailed size chart in the instruction PDF. I currently measure 39″ bust, 32″ waist, and 42″ hip. I decided to go with the regular size 10, as the finished garment measurements seemed like they would be comfortable to me.
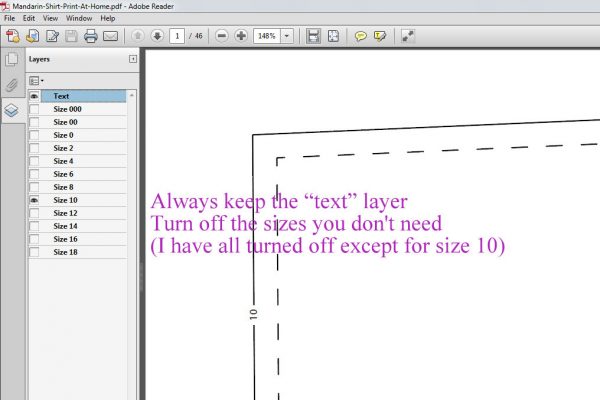
Once you know which size you will need to print, click on the “layers” tab to the left hand side (it is beneath the paper and paperclip icons). You will see this menu of all the sizes! If there is a little eye icon, it means that layer is visible. Click on the eye icon to deselect a layer. Here, I have everything off except for the text and size 10. You’ll want to leave “Text” on no matter which size you choose, or you won’t have any words left to tell you which piece is which 🙂
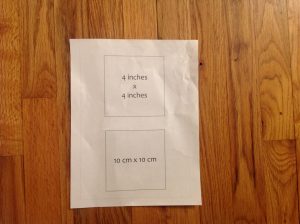
An important key to PDF sewing patterns: always print your test square first, and measure it with a hard ruler! For the Mandarin top, the test square is on page 37.
You want to be sure your pattern prints at the correct dimensions, which is why PDF patterns include a test square for a reference point. Find and print this page first, before printing the rest of your pages. If the dimensions of the test square are off by even an eighth of an inch, it can drastically alter the fit of your garment, and you don’t want to print out all 20+ pattern pages in the wrong size!
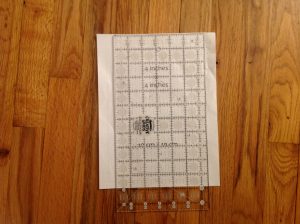
Flexible measuring tapes (like the kind you use to measure your body) can sometimes stretch and do not always provide a precise measurement. This doesn’t matter a whole lot while taking body measurements, but it can alter your test square measurement. Hard rulers don’t warp and stretch as easily, so it is easier to measure the test square precisely. I love my clear quilting ruler because it’s so easy to lay it on top and see if it’s lining up with the test square.
If your test square is the wrong size, be sure you are opening your pattern in Adobe Acrobat (NOT a web browser). When you go to print, be sure to select “Actual Size” under “Size options” on Windows, or set your scale to 100% if you are using a Mac. Sometimes Windows Adobe Reader will also have a “Page Scaling” option on the print screen, in which case you would select “none”. The point is to tell the program that you don’t want it to auto correct for you. Haha!
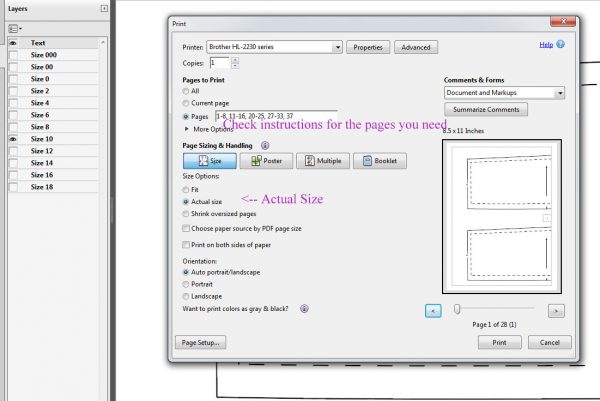
The last thing to do is to check which pages you actually need to print! The Mandarin top has 46 pattern pages, but thankfully you won’t need all of them. There is an excellent chart in the instructions which lists the pattern pieces and their corresponding printed pages. Above, you will see I have selected all of the pages I need to make a size 10 regular with 3/4 sleeves!
Step Two: Print
Self explanatory 🙂 Hopefully your printer has plenty of paper, toner, and ink!
Step Three: Trim edges
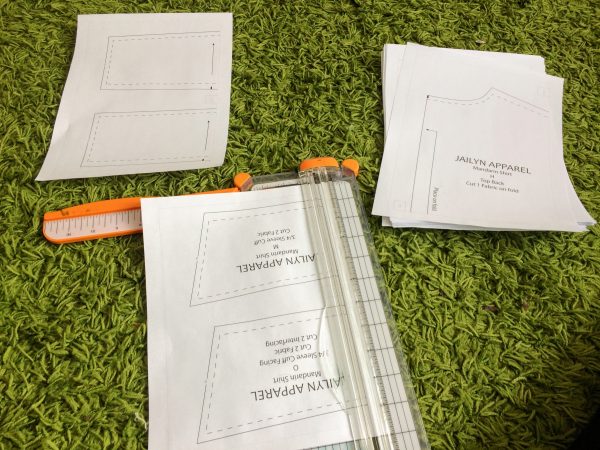
The sides and tops of some of your pattern pages will need to be trimmed down (this will make sense in a minute). I like to use a paper cutter/trimmer for this step, it keeps the lines nice and straight. Toward the edge of the page you will see a thin grey line – trim right on this line or just outside of it. I prefer to trim just outside the line – then I can use it to align things while attaching pages!
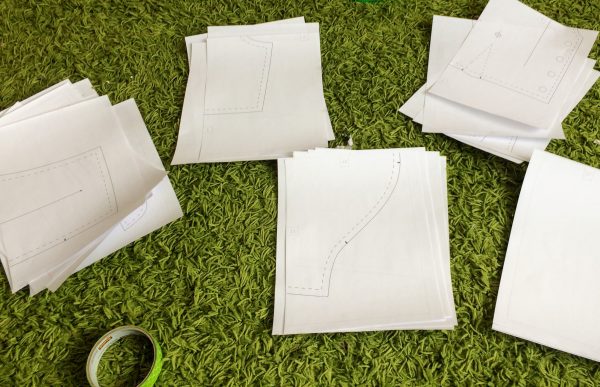
I love that Jodi has arranged the Mandarin pattern so that each pattern piece can be assembled separately and on only a few pages. In other PDF patterns I have used, multiple pieces will blend together on one page, and it gets a little confusing. But for the Mandarin top, I could clearly see which papers I would need to connect for each piece! I separated all of my trimmed pages into piles according to which piece they belonged to.
Step Four: Assemble the pattern
This step is infinitely easier if you use a window during the day time! This helps you to see through your pattern pages and align those margins more precisely. I’ve also seen people use glass-top tables with a light shining under them at night, or a traditional artists’ tracing table. If you can’t do any of these things, a blank wall works well, simply to save your back and keep the paper off the floor!
I also use a glue stick rather than tape to assemble patterns. This way, I am able to slide the paper slightly or even peel it off and start over. I feel like tape is less forgiving, but some people prefer it! I use masking tape to attach my pattern pieces to the window.
The biggest pattern piece for the Mandarin top uses 6 pages in a grid formation (the sleeve). Let’s walk through assembling one 2×2 grid visually, so you will see which pieces need trimming and which don’t. I started with the upper left corner of the top front bodice.
1) Start by taping up the upper left piece, no edges trimmed

2) Attach the upper right piece, with the left edge trimmed. Align page numbers, page margins, and pattern markings

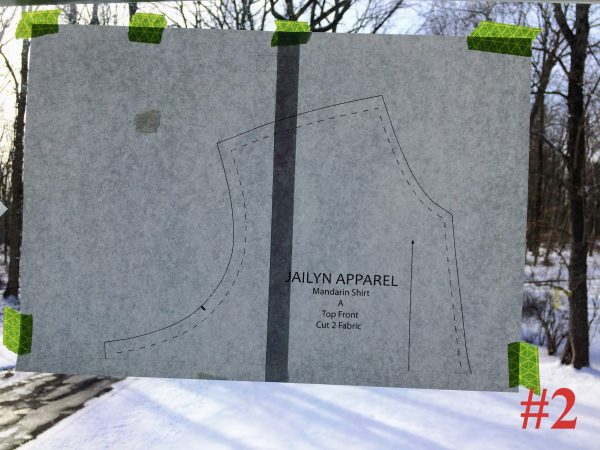
3) Attach the lower left piece, with the top trimmed
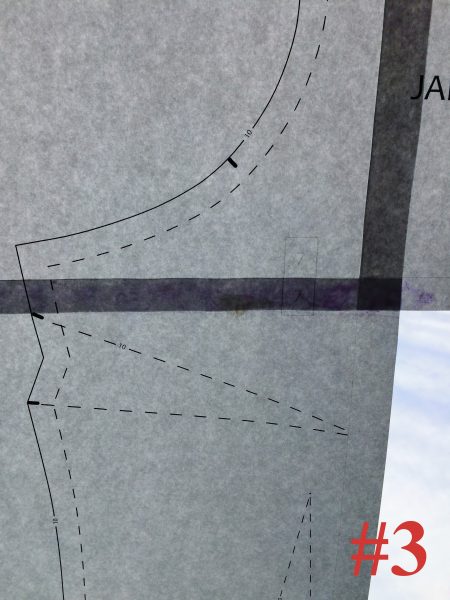
4) Attach the lower right piece, with the top and left edges trimmed
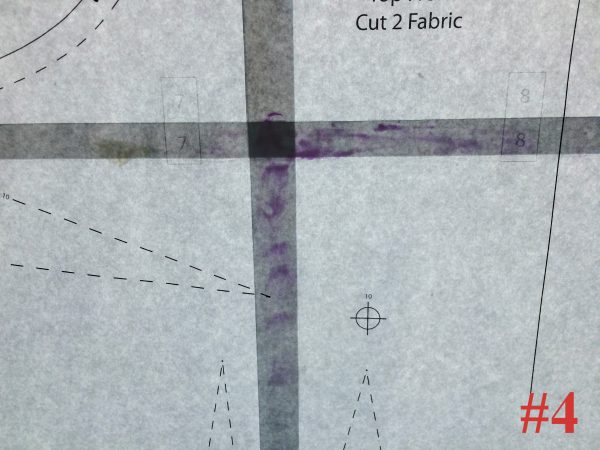
Don’t worry if the edges of your actual pieces of paper are aligned, as long as the margins and other markings line up you are good to go!
Step Five: Cut out the pattern
No pictures of this step, it’s also pretty self explanatory. Cut along the solid lines, not the dashed lines. The dashed lines show the seam allowances.
And now you have your pattern all ready to go! Woohoo!! Next week, we will discuss adjusting the pattern for fit, and cutting out your Muslin.
Save