In today’s column, Leah provides step-by-step instructions to accomplish the alterations that you saw earlier in the week–by the way, apologies for the missing photos in that post. I’ll be able to repost them when I return from vacation. We’re still thinking about what to name this column, so any ideas are welcome. And remember: the winning tagline idea for this entire blog could put a Two Figs sleepwear item in your lingerie drawer. You have until midnight next Tuesday to enter.
This week, I’m going to start with the most crucial alteration in my repertoire—shrinking a bra band. I’ll be using a 34DD Victoria’s Secret Very Sexy Push-Up. My usual size is 28FF. Unfortunately, with this particular bra, the band is so stretchy that even when I made it as small as possible without moving the straps, it’s actually still a bit big on me. I would say it’s about the equivalent of a 30-½ band. So I’d recommend doing this with a band that’s no more than two sizes too big or is not too stretchy. Or, you can remove the straps with a seam-ripper, shorten the band as needed, then sew the straps back on wherever you please.
Materials: Bra, thread, needle, scissors
Project time: 10 minutes
Click through to read the illustration-heavy instructions.
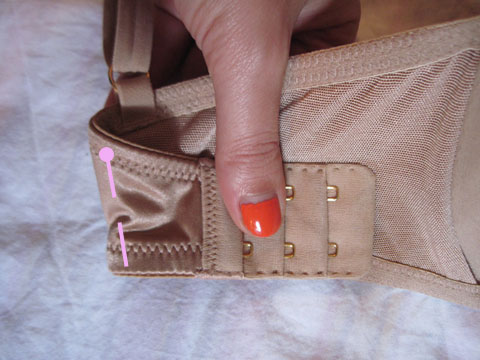
1. First, start with the side of the band with the hooks. Fold it under at the strap area. Pin in place.
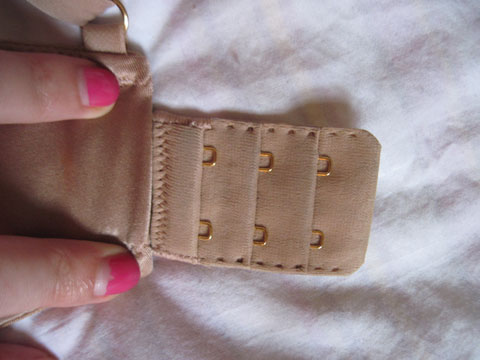
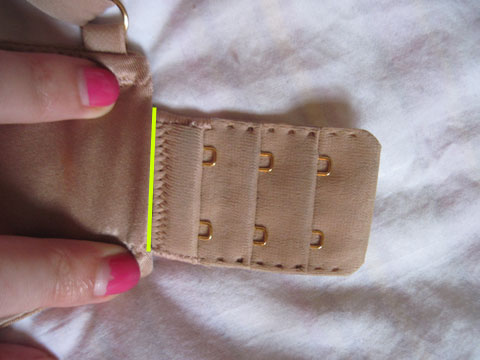
2. Next, fold the hooks back out. Pin in place if you like, or just hold it.
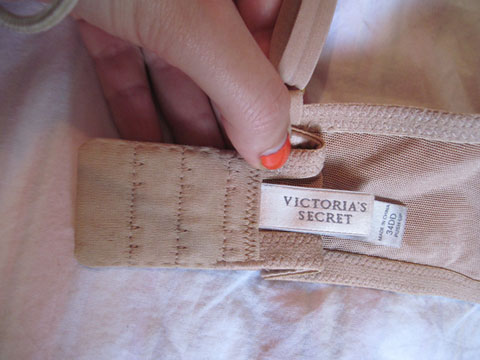
3. Look at the other side. Be sure the hooks portion of the band is flush with the folded fabric.
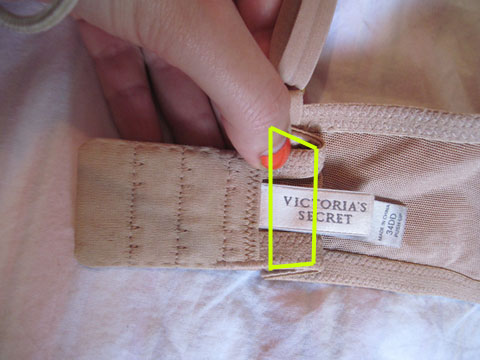
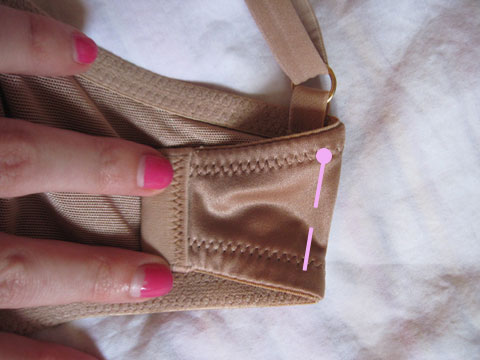
4. Sew in place along the yellow lines, avoiding the brand tag if possible. Try to keep the fabric as flat as possible while you sew. It may be helpful to iron the band while it’s folded before sewing.
5. On the front side, sew a slip stitch along the yellow line, where the hooks meet the folded fabric. This step will help your band to stretch evenly when you’re wearing the bra, instead of pulling on the thread alone. See below for slip stitch instructions.
How to Sew a Slip Stitch:
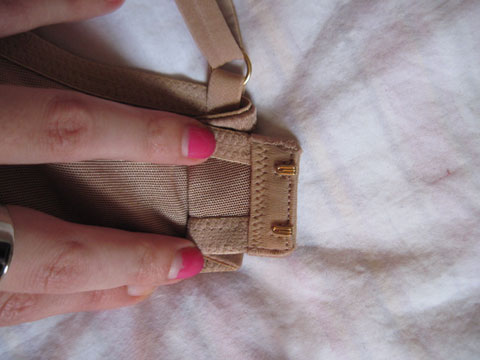
6. Now do the same thing to the other end of the band, the eyes. Fold the eyes under at the strap area. Pin in place.
7. Fold the eyes back out.
8. Check that the eyes are flush with the folded fabric.
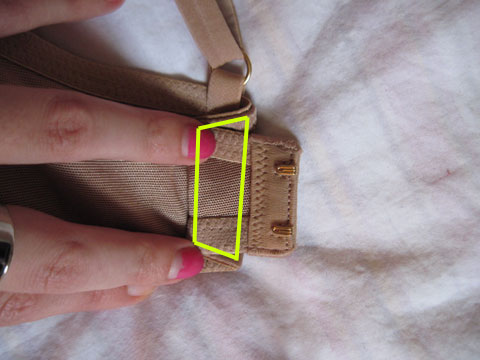
9. Sew in place along the yellow lines.
10. Sew a slip stitch on the front side, along the yellow line, where the eyes meet the folded fabric.
You are done! If the band is still a little too loose or stretchy but you don’t want to remove and reattach the straps, you can decrease the stretchiness by sewing a straight, tight line along the top and bottom hems of the band. Don’t sew along the entire band, though, because then you’ll have no stretch at all. Try just a quarter or a third to start. You can always sew more, but removing stitches is a pain! Additionally, I recommend using a sewing machine for this step since it creates more uniform stitches. If you don’t have a machine, sew in one direction, then go back over your stitches in the opposite direction, filling in the space between stitches so that it looks like a straight line—not a series of dashes—when you’re finished.



Leah,
How do you know how much to shorten your bra by? I’m currently in a 28G and find 30 bands just a little too loose for my liking, and depending on the bra, even the 28 bands are too loose! So, do I just shorten each side by 1 inch? Or does it always work by folding back to the straps, regardless of how much you want to shorten by? (I hope that makes sense.)
Hi Karen,
The best thing to do is a little guess-and-check work, since every bra (even the same size from the same brand) can stretch differently. I would recommend doing the back and forth fold like above, but pin it in place with a couple vertically placed safety pins (so you don’t stab yourself!) and try it on before sewing. If it’s too tight, place the first fold a little farther out from the spot where the band meets the strap. It’s best to do it as evenly as possible on both ends of the band to avoid warping the placement of the straps.
Conversely, if you need to tighten your band just a small amount, it might be easier to buy a bra band extender and attach it inside the existing hooks panel.
This post is excellent, and is going to help me out so much! I have a couple of bras that are still in excellent condition – little to no wear – but I’ve lost a bit of weight so they’re a bit big. Now I can alter them and get some more wear out of them! Thanks for the tips!
Yes, bras are expensive. If I can follow the steps correctly maybe I can ‘redeem’ one or two.
Great Tutorial! I used this as a jumping point and it saved a number of some oversized bands. I found that I need to reinforce the seam closest to the hook/eyes as that’s where a lot of the stress is placed.
Any idea if this would work for a longline bra that goes all the way to the hip? I can’t find one in a smaller band size than a 32 with my right cup size, but I need probably a 30. Could it work?
I honestly don’t know. I’ve never even tried wearing a longline bra since no one seems to make them in 28. However, this tutorial is very easily removed without damage to the garment. I would suggest trying it first with a really fine needle (so the fabric isn’t compromised if you have to undo it) and wide stitches. If it seems good, then you can go over it again with tighter, permanent stitches.
I found the easiest solution to loose bra bands and it fixes your loose bra band in only a few seconds, it’s called Rixie Clip Bra Band Tightener! I literally can not wear bras without it since I started to wear it!! Take a look, you will see what I mean! http://www.facebook.com/rixieclip
Oh my goodness, thank you SO much for posting this! I bought these lovely bras then suddenly lost weight, and I didn’t want to throw them away after 2 uses! I’m a 34F, so I have a lot of trouble with shirts and button-front tops. Thank you again for your amazing work!
you just saved my life. -.-” Im a little smaller than a 28 band and im a DD, so i usually buy the 32D bras but as you could imagine there a bit big in the band and its always riding up ive tried taking in a bra band before but i messed it up a bit so im really glad to have come across how to do it correctly Thank-you!