I’ve been spending a lot of my time refashioning and altering my clothes this year. It’s cheaper and more environmentally friendly than buying new and these were things I liked but never wore because they didn’t fit well. I’ve also learned a lot and had fun in the process.
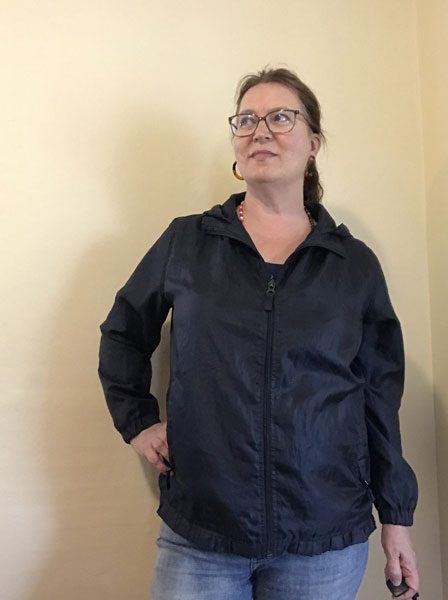
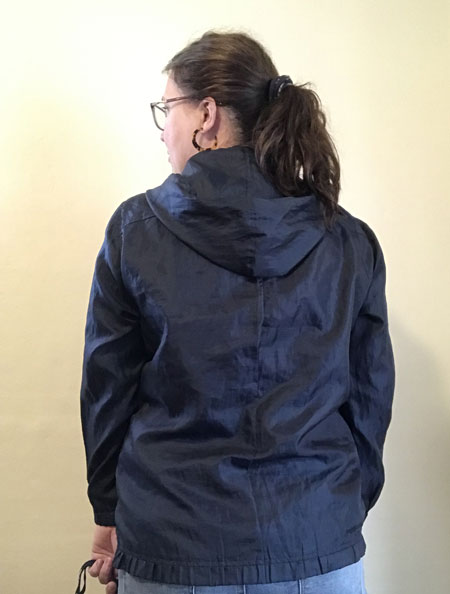
This project is a windbreaker I bought while on vacation in England. I left my rain jacket behind in a hotel and this was the fastest replacement I could find. It’s a nice, lightweight, water-resistant-ish windbreaker that can fold up into a pocket for easy storage. It’s a men’s medium and I currently wear a women’s L/XL/14. Sorry, there’s no before pictures. I decided to write this after I’d started my alterations. And since the jacket is a dark navy blue, it’s tough for the camera to show what my eyes can see. I hardly ever wore this jacket because it was oversized and sloppy looking. And I never bought a windbreaker that fit better because I already owned one…that I never wanted to wear. Now that I’ve altered it, I’m wearing it all the time.
I’ve been through a lot of trial and error with this jacket. I first removed the elastic from around the hip and cut off the elastic at the sleeves. I sort of regret the sleeves. Learn from me: don’t make any cuts until you absolutely have to. Sure, it would be a lot of trouble to shorten the sleeves and take-in the elastic band. I’d have probably cut them off later anyway, but I’ve made plenty of premature cuts I’ve come to regret, so it’s a good policy to have in general.
I found Leila’s tutorial here very helpful in a few ways. First, it gives a good process: start with the shoulders, then the back, then the sides. I always start with sides and then realize the shoulders don’t fit. After reading her post, I chose to rip out the alterations I’d already made to the sides so I’d have a fresh start.
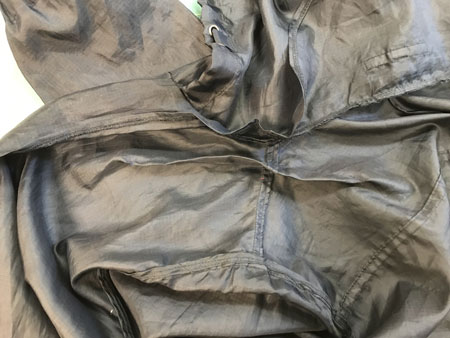
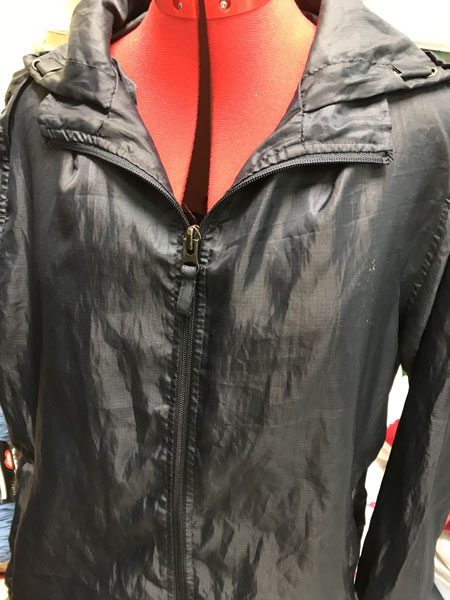
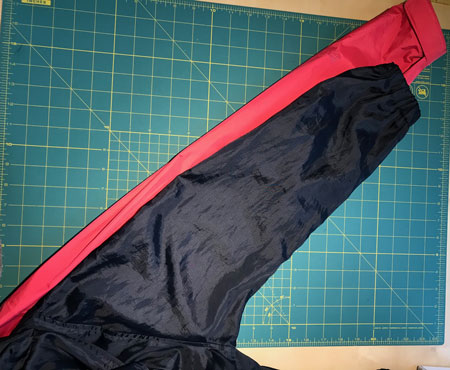
Leila’s method for easily adjusting a shoulder is to hide a dart near the collar. It’s quick and easy and eliminates the need to redo the sleeves. Adjusting sleeves is complicated, and for me it would have also taken away fabric in the bust, right where I needed it. I placed my dart about an inch from the collar and took in the shoulders by 1.5 inches. The hood will hide the darts in the back. On the front, I’ll probably mostly wear the jacket partly zipped and the “collar” created by the open top part will hide those darts. But they’re reasonably even and well constructed, so I don’t mind showing them off.
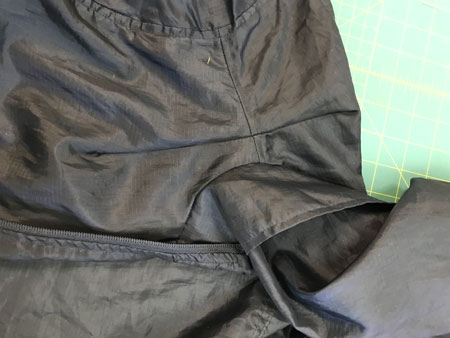
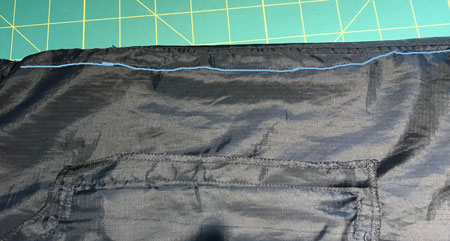
After adjusting the shoulders, I decided to try taking-in the back just an inch to see how it affected the fit.
That worked pretty well and put the side seams where they belong and gave enough room in front. But again, I didn’t adjust for movement, and the seam pulled across the back at the shoulders, leaving holes in the fabric. So I adjusted the seam to give more room there. This was not at all a thoughtful change…I made an emergency adjustment 5 minutes before we left to go to a local fair and ripped-out the old seam in the car. I added back about half an inch at the shoulders and eased back to the original stitching at about the top of the front pocket. It’s better, but looks odd from the back and I’m still getting some pulling at the shoulders. I’m not sure if I’m going to adjust the seam again or just reinforce it and move on.
So far, I’ve only taken the jacket in by an inch. By making some of the adjustment at the back, I’ve compensated for the extra room my bust needed in the front and I was able to make a more refined adjustment at the waist. But I was still able to take it in up to an inch on each side.
When I put the elastic back in the sleeves I made them too short. They’re fine if my arms are at my sides, but ride-up when I move my arms. I plan to switch to a narrower elastic and change how I make the casing to get more length.
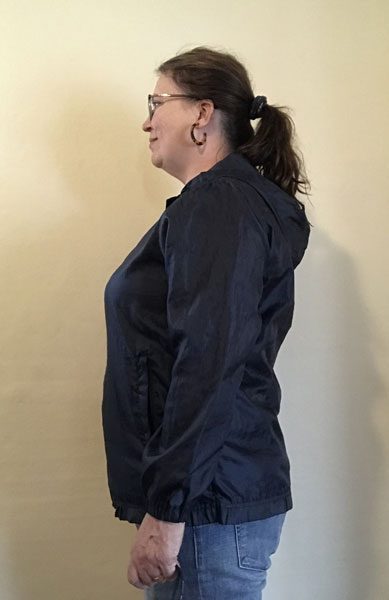

That was a lot of work, but I’m so pleased with the results. I’ve worn this jacket more in the last two months than I have in the last 6 years. I treated it to be water resistant and sized it to fit over a sweatshirt, so I should be able to wear it into October. And stay tuned…I have two more jackets in my mending basket.