Alrighty, are you ready for Day Two?! At this point, you’ve purchased your pattern and fabric (intro post) and printed/pieced your pattern together (Day 1). Now we are ready to take a few more measurements and do some adjustments to the pattern before cutting it out!
Jodi has outlined directions for this process in her PDF instructions. I’m a very visual learner, so I thought I would try and document it more in-depth for other visual people out there.
For this process you will need:
- Top Front and Top Back pattern pieces
- The bra you plan to wear under your Mandarin Shirt
- Wear this while taking your measurements!
- Flexible tape measure
- I used a retractable one similar to this, the weight at the end helped hold the tape steady while measuring
- Pencil
- Ruler
- I love using a clear quilting ruler for making pattern adjustments! So easy to see if you’re lining everything up.
- Scissors and/or paper trimming tool
- Extra paper
- Only needed if you need to increase your pattern size. I like to use wrapping paper. You could use printer paper, junk mail, just about anything!
- Scotch tape, glue stick, or similar
In order to get a better fit, you are going to need to measure your bust apex in two increments, and compare those measurements to the pattern piece for your particular size. If there is less than a quarter of an inch difference between the two, you don’t need to make any adjustments. Lucky for you – I have a long torso and a lot of forward projection and needed to increase the pattern in two places. So you’ll get to see how I did all of that!
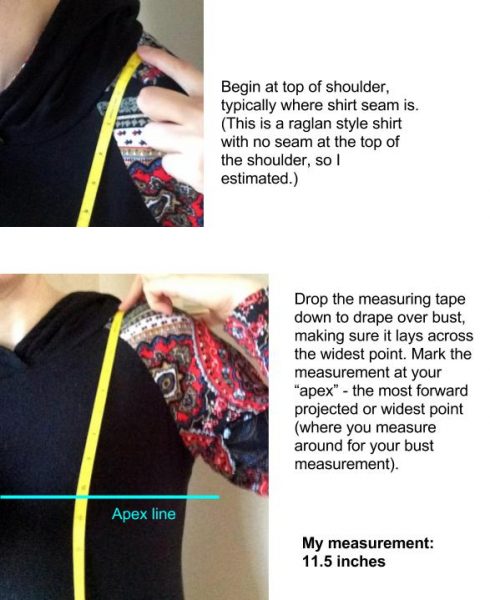
First up, the measurements. Measure from your shoulder seam to bust apex:
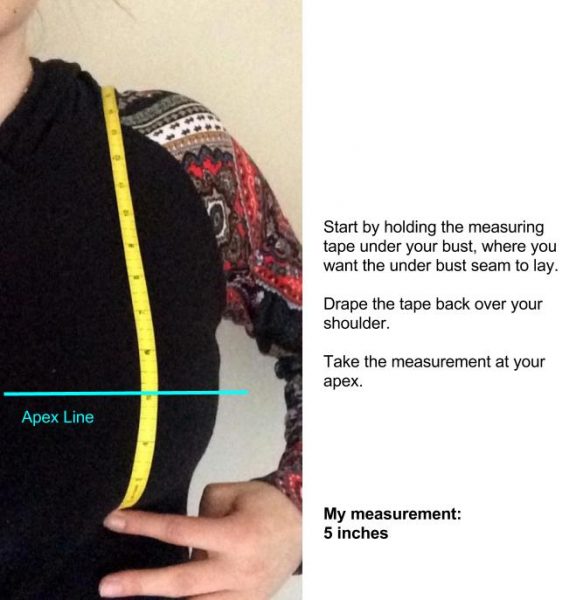
And then the underbust seam to bust apex:
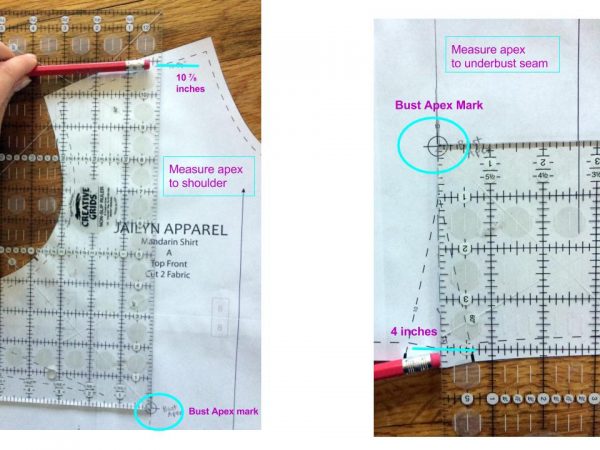
Then measure your pattern piece. For the Mandarin shirt, Jodi has included dashed lines to show the seams. Measure from the bust apex mark to the dashed lines:
Then you’re going to need to do some calculations. Here are mine as an example:
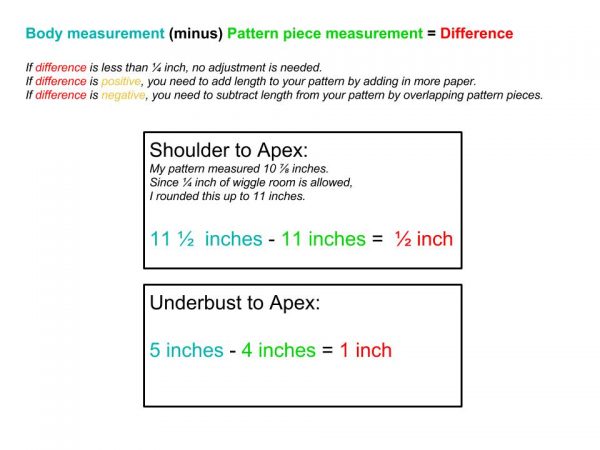
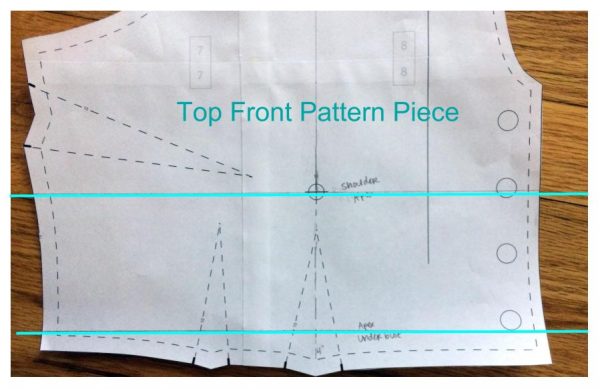
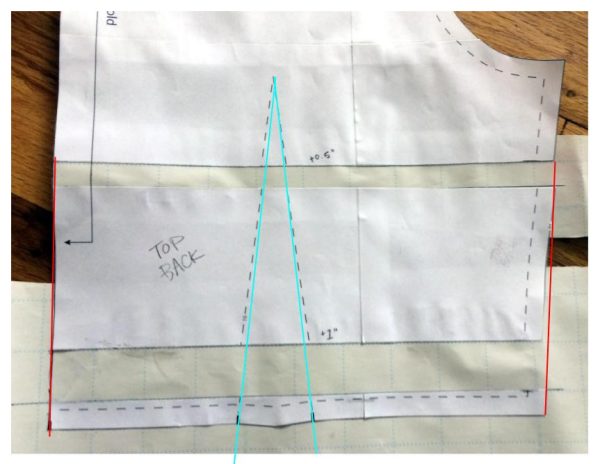
If you have a difference from the Shoulder to Apex, you will need to slice your pattern across the bust apex and adjust accordingly (top line). If your difference is from the Underbust to Apex, you will need to slice across the bottom of the pattern piece, just above the seam line (bottom line):
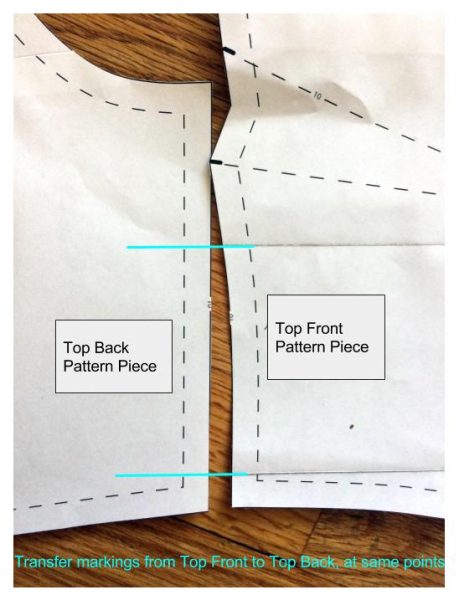
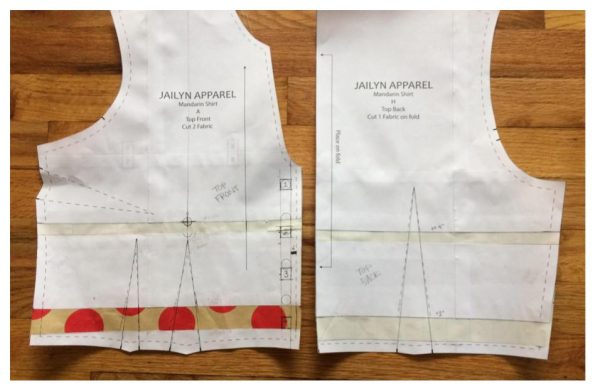
You will also need to adjust your Top Back pattern piece in the exact same way. You’ll want to be sure your adjustment lines are at the same level on both pieces. I lined my pieces up side-by-side and then marked my Top Back piece from there:
Since both of my differences are positive, I need to add paper into my pattern piece. I’ll be showing that process below. If your measurements are negative, follow the same process, but overlap your pattern pieces the desired amount instead!
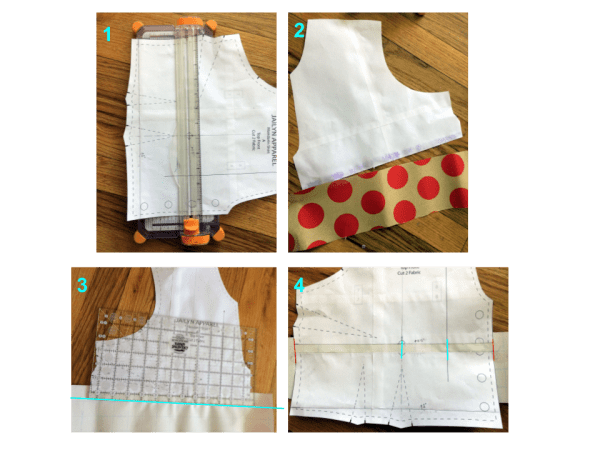
- Use a straight edge to draw the line(s) you need, as shown above. Then use a paper cutter (or a steady hand with scissors) to slice your pattern
- Glue or tape a section of paper to the bottom of your upper pattern piece (I like to use wrapping paper remnants)
- Using a straight edge, measure out the necessary amount from the bottom of your upper pattern piece and draw a line. I love using my clear quilting ruler for this part – it’s easy to see if I have everything lined up straight!
- Glue or tape your lower pattern piece along the line you drew, being sure to line up all markings (blue lines). It is helpful to extend the markings on to the filler paper to make alignment easier! Blend the edges of your pattern piece so they align (red lines).
Repeat for the bottom line (Underbust to Apex adjustment) if needed.
Once you’ve completed this process, you will need to adjust your darts. This ensures that the points end in the same place as the original darts:

- Measure the original distance from your bust apex mark to the top of the right dart. On the size 10 regular, this is 7/8 inches.
- Measure the same distance down from your new bust apex mark. This is the new “point” or end of your dart.
- Use a straight edge to draw a line from the original dart edges to the new dart point.
- Repeat for the second dart. This is what it will look like when you are finished!
Now, repeat all of these steps for your back pattern piece. The back dart point shouldn’t be changed with your pattern adjustments, so you’ll only need to draw a new line from the dart edge to the dart point (blue). Be sure to blend your edges together again too (red).
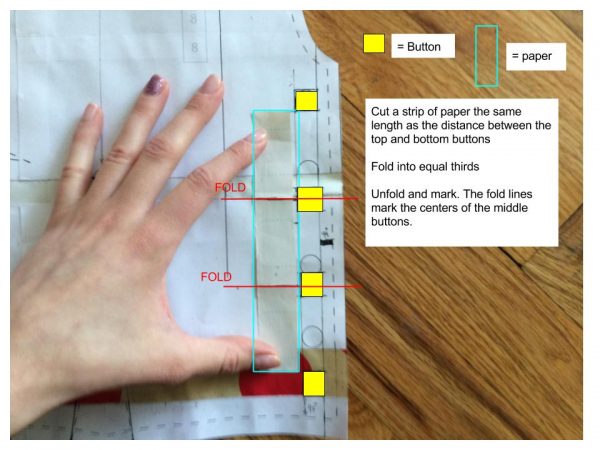
The final thing you will need to do is adjust the button placement on the Top Front piece. The buttons are marked with circles on the pattern, but to make it easier on myself I drew a box around each one. I came up with this method for placing the buttons after arguing with a lot of crazy fraction calculations. No math needed for this method! Just a scrap of paper:
*technically if you adjust the button placement on only the Top Front pattern piece, it won’t be uniform from top to bottom. There are still five more buttons on the Bottom Front pattern piece. However, when I tried to adjust spacing across both pieces, I kept ending up with buttons directly on top of seams, etc. It was just awkward. I don’t think there is enough of a spacing difference to cause a problem, and it’s not going to bother me. If you would rather invent a different way to do this, of course you are welcome to!
And VOILA! You have a pattern adjusted to your specific measurements, which will hopefully help you to have less fit issues to resolve when making your muslin!
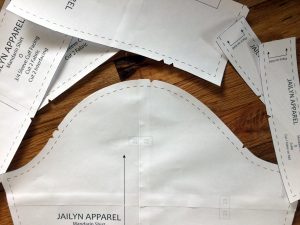
The only other pattern adjustment to do, if you want to, is to cut out the alignment notches. Jodi’s notches are straight, bold lines. You may be used to seeing tiny triangles. I decided to cut out all of the notches with triangles, because I knew I would forget to mark them if I didn’t!
Next week, we’ll be cutting out our pattern pieces and beginning our muslin! Get your fabric washed and ironed!
Save
Thank you for posting about these adjustments! I’ve noticed that proportions along the vertical dimensions can still be a problem even with clothing from full-bust specialist companies. Now, I may actually purchase and try this pattern.
You’re welcome! I’m glad this was helpful to you! Jodi (the pattern writer) has detailed instructions included in the pattern, too. It’s really great! I almost always have to adjust sewing patterns for length, but I’m usually just guessing how much to add. It was nice to be able to get exact measurements here!